The Unholy Heel
The principle of those 'Unholy Heels' is fairly simple: Knit together the last 'live' stitch with the first 'reserved' stitch, and make a new stitch by picking up and twisting the running thread between these stitches.
This can be done in hand knitting, and on knitting machines, too. I have not yet tried this on a Japanese machine, but it should work more or less the same: instead of working the pushers to 'reserve' stitches, those stitches are being put on Hold.
I tried it a few times, and it does work beautifully at the Passap Duomatic 80.
Therefore, my description will be with the Passap DM80:
PDF Version of Tutorial (English)
This .pdf file has the description with the pictures, and at the end a description without pictures to be used at the knitting machine.
Knit your sock (as written in the Passap Duomatic Manual) until you come to the Section C, Heel
Row counter to 000
Lock GX/BX
On front bed pushers in Working Position (WP) equaling number of stitches
Lock at right
At the right side, put first pusher into Resting Position (RP)
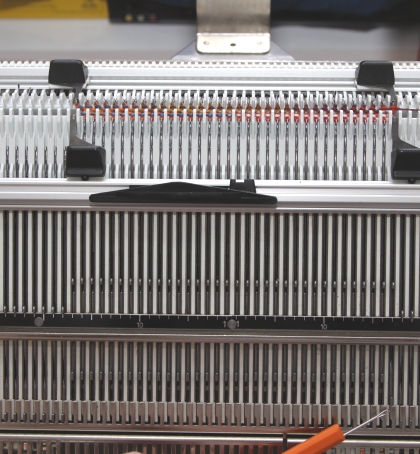
Figure 1 First Pusher right in Resting Position
Knit 1 row
Lock left
At the left side, put first pusher into RP
Knit 1 row
Continue knitting and put 1 pusher into RP at the side where the lock is, until there are about one third of the stitches on the left side in 'reserve' (= pushers in RP), one third of stitches in the center 'live' (pushers in WP), and one third of stitches to the right in 'reserve' (= pushers in RP), or whatever division of stitches you found the best for your socks.
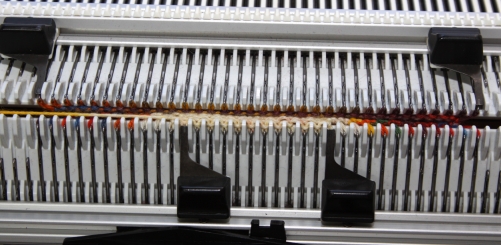
Figure 2: One third left in 'Reserve', the center third, and the third right in 'Reserve'
The lock should be at the left side, and you have just put the last left pusher into RP to get to the number of stitches you intended.
back to the topNow you put the first right side pusher next to the 'live' center stitches and put that pusher into WP.

Figure 3: put first right-of -center pusher back into WP
Take the stitch that is on this needle and put it on the needle to the left so that there are two stitches on this needle (the last live stitch and the stitch where you just put the pusher into WP again).
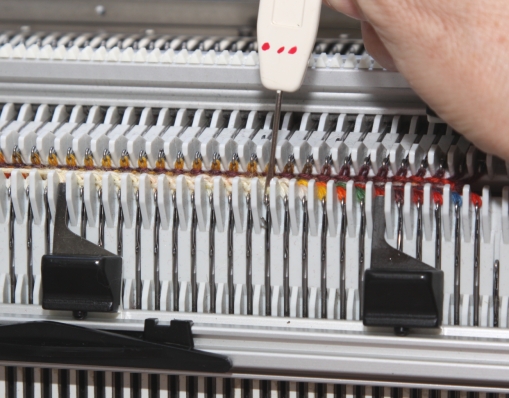
Figure 4: Take stitch and put it on needle to the left (center)
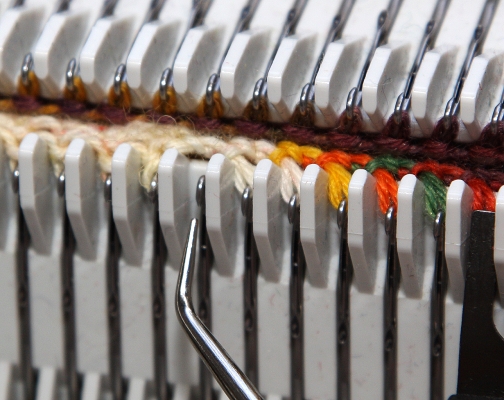
Figure 5: empty needle
Then pick up the running thread between the needle with the two stitches and the needle to the right of the empty needle, twist it, and put it on the empty needle (Figures 6 to 12).
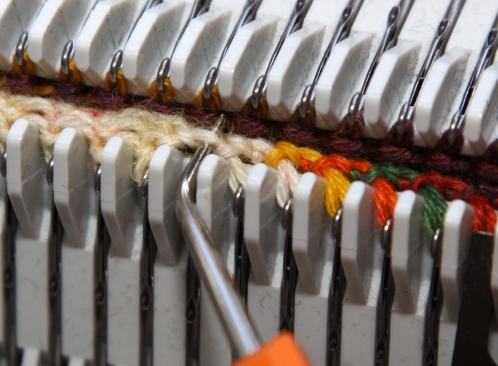
Figure 6: Pick up running thread
Note:
you know that you have the correct thread if the loop tightens on the next needle (in this
case, the needle to the right).
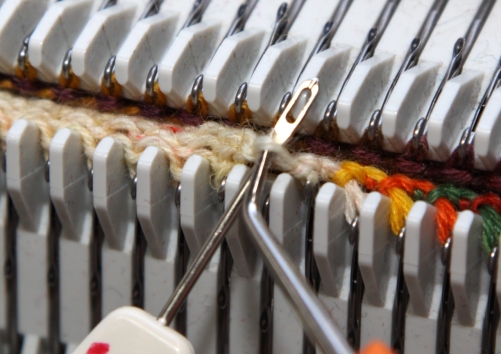
Figure 7: Insert tool into picked-up running thread
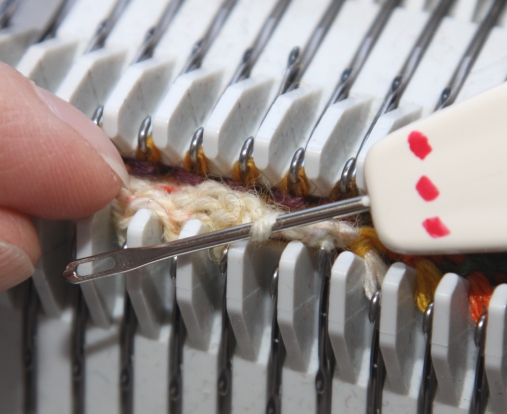
Figure 8: start to twist running thread
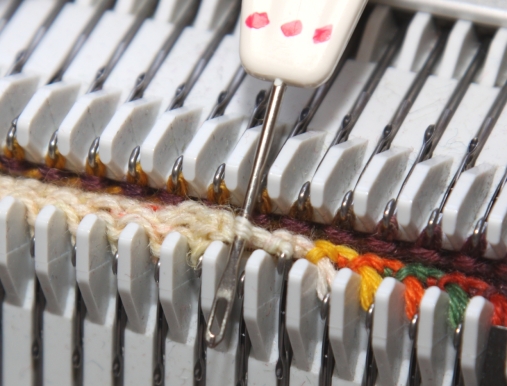
Figure 9: twist running thread to form a loop
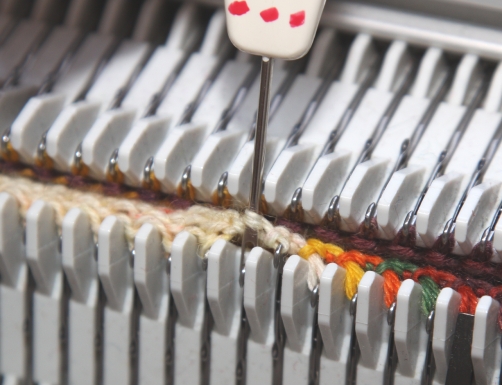
Figure 10: put twisted loop over empty needle as a new stitch
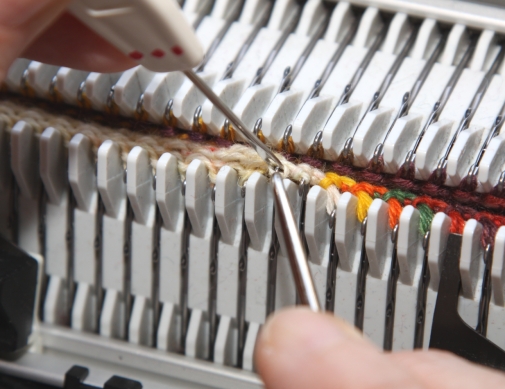
Figure 11: use orange tool to get the loop over needle
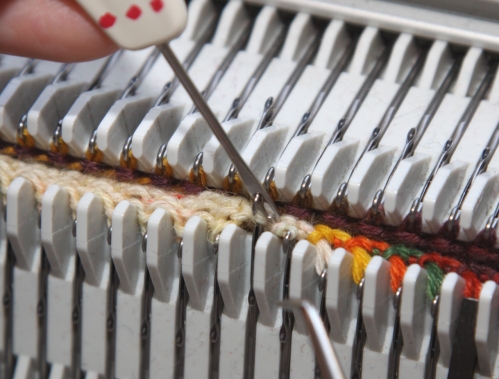
Figure 12: Done! Loop is twisted and over (formerly) empty needle
back to the top
Knit 1 row
Lock is now on the right side.
Put the first pusher on the left side next to the center stitches back into WP.
Take the stitch from this needle and put it on the needle to the right (towards the center).
Pick up the running thread between the double-stitch center needle and the stitch to the left of the empty needle, twist the thread, and put this stitch on the empty needle (Figures 13 - 17).
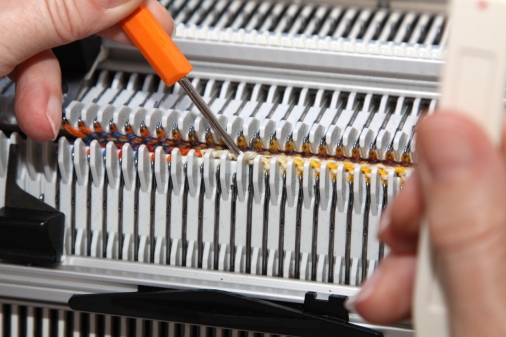
Figure 13: K2tog on the left side of center
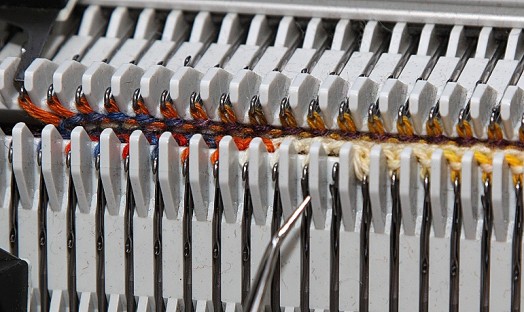
Figure 14: From left to right: 2nd Reserved stitch, empty needle, K2tog from last live stitch and first reserved stitch
back to the top
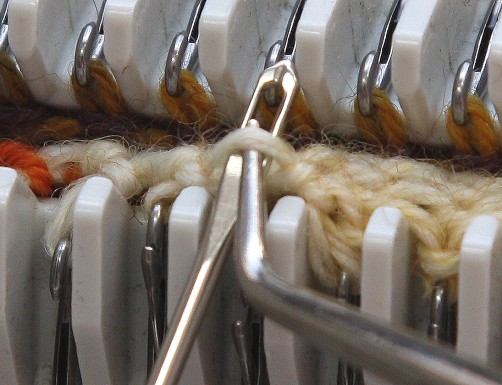
Figure 15: Picking up the running thread and inserting tool to twist a loop
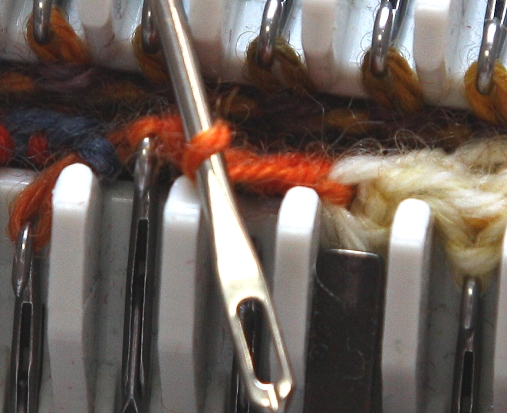
Figure 16: Twisting the running thread
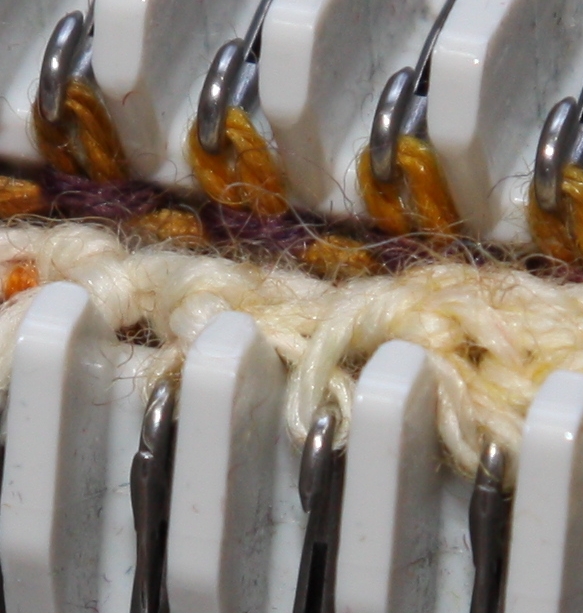
Figure 17: (from left to right) 'Reserved' Stitch, twisted loop, 2 stitches on needle
back to the top
Knit 1 row
Lock is now on the left side.
Continue to put the next pusher into WP opposite the side where the lock is, transferring this stitch to the next needle towards the center, pick up the running thread and put the twisted loop on the empty needle.
When you come to the next-to-last stitch on the right side, remember that you 'skipped' the first needle when you started the heel (figure 18). Therefore, you have to 'fish' a little bit to find this running thread that will tighten the loop on the back bed.
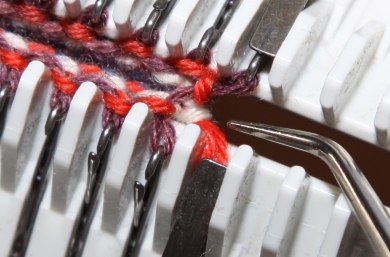
Figure 18: skipped first stitch from first row
For the last stitch on the right side you have to take a thread from the row below and make sure that this thread is reliably twisted - it still will give a little hole, but it's a little hole.
With the lock on the right side, prepare the last stitch on the left side,
Change the lock to CX/CX, and set the row counter back to 000, and knit the first row of the D section (Passap Manual) - the foot.
back to the topAdditional notes:
It does not seem to matter if you twist clockwise or anti-clockwise. What matters is that there is a twisted loop on the needle - otherwise there will be a hole.
The last stitches on the left side are less of a problem, but the running threads are easier to find on either side if you put the orange tool between both beds and stretch the fabric somewhat to the outside to see the threads clearly. (see Figure 19)
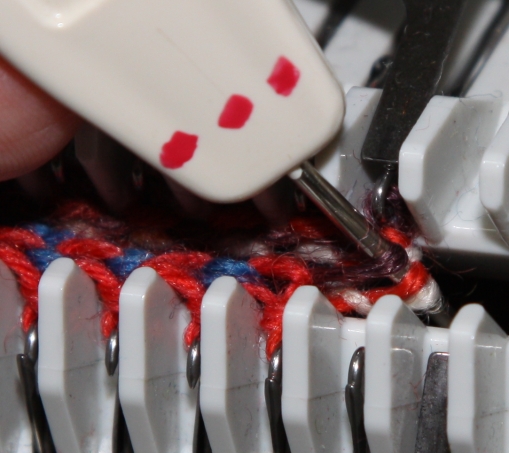
Figure 19: Stretching the threads on the right side to find a suitable running thread for the last twisted loop
I have found that the orange tool is the best one for picking up the threads and putting them on the needles. Two orange tools would be perfect, but any other single-stitch transfer tool works. I had more problems with the two-eyed bodkin, for whatever reasons.
Be careful with the weights. If too much weight is put on the heel, it is *very difficuIt* to fiddle the twisted loop on the empty needle. I had more success without weights (apart from the two clamps that I always have on the socks), or one heel gripper and a clamp rather than with a heel gripper and the 'normal' weight.
If anyone has ideas, tricks or suggestions to make this easier, faster, or better, please do contact me.
Thanks!
Makoshark
Dedicated to A.Charlene D. - my teacher, mentor, and steadfast supporter in all my
Passap-endeavours :)
Thank you, Hilary, for the catchy name.
• Home
• Unholy Heels in English
• Unholy Heels auf Deutsch
•
copyright © by Martina Kosloff, all rights reserved worldwide